Step-by-Step Guide on How to Sew with Needle and Thread
Learning how to sew with needle and thread is a valuable skill that can help you repair clothes, create custom garments, or express your creativity through crafts. Whether you’re a beginner looking to fix a tear or an aspiring tailor, mastering hand sewing is essential. This comprehensive guide will walk you through the basics of hand sewing, from gathering the necessary tools to completing various stitching techniques. By the end, you’ll be confident in your ability to sew with needle and thread for different types of projects.
What You Need to Get Started
Before diving into sewing, it’s crucial to gather the right tools. Here’s a list of basic sewing essentials to include in your sewing kit:
Basic Sewing Tools

- Needles: Use “sharps” for general hand sewing. If you’re working with thick threads or embroidery floss, opt for larger needles such as “embroidery” or “crewel” needles.
- Scissors: Invest in good dressmaking shears for cutting fabric and a pair of pinking shears for fabric edges to prevent fraying.
- Pins and Pincushion: Pins hold fabric in place while sewing. A pincushion helps organize them neatly.
- Measuring Tape: To measure fabric and ensure accurate stitching.
- Marking Pens: Air- or water-soluble pens are perfect for marking stitching lines or embroidery patterns on fabric.
- Seam Ripper: A tool to undo stitches when you make a mistake.
- Thimble: Protects your fingers from needle pricks, especially when pushing through thick fabric.
- Thread: Choose cotton thread for most fabrics. If working with heavier materials like upholstery, use thicker threads like embroidery floss.
These basic tools will help you start hand sewing and complete your projects with precision and ease.
1: Threading the Needle
The first step to sewing with needle and thread is, of course, threading the needle. While it seems simple, doing it correctly is crucial to avoiding frustration later on. Here’s how to thread a needle:
- Single Thread: Cut a piece of thread and thread it through the needle’s eye, making sure there are a few inches of thread left. Knot the end of the thread.
- Double Thread: Pull a length of thread and fold it in half so that the ends meet at the needle’s eye. Tie a knot at the end to prevent the thread from slipping out.
Some may prefer double threading as it offers added strength. You can also use a needle threader for ease if you’re struggling with threading.
2: Knotting the Thread
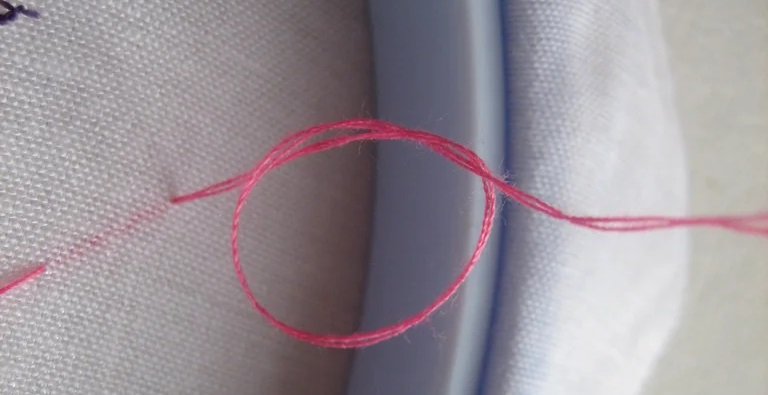
Before you begin stitching, it’s essential to secure your thread. Here are a few methods to knot your thread. Here are common Knots for hand Sewing:
- Simple Knot: Wind the thread around your finger to create a loop, then pull the ends through to form a knot.
- Loop Knot: A method for double threads, where you tie the two tails together to create a knot at the end of your thread.
The knot prevents the thread from slipping through the fabric as you sew, ensuring a secure stitch.
3: Basic Stitches
There are various stitches used in hand sewing, each with its purpose. Let’s look at some of the most common ones.
Running Stitch
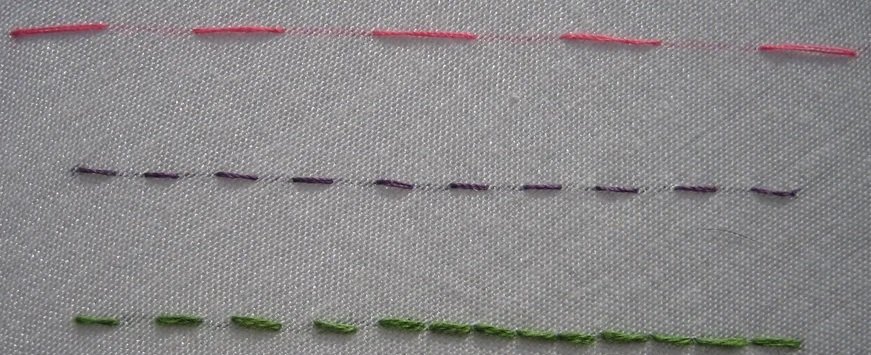
The running stitch is one of the most basic and commonly used hand stitches. It’s ideal for quick and simple stitching. Here’s how to do a running stitch:
- Push the needle up through the fabric, pull it through, and then push it back down.
- Continue creating a series of evenly spaced stitches.
- Use this stitch for temporary basting or when you need to join two pieces of fabric lightly.
Basting Stitch
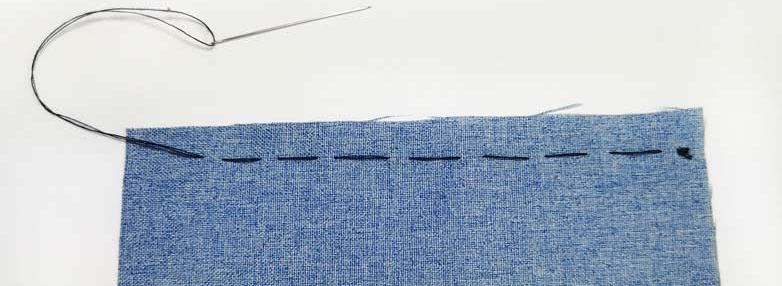
The basting stitch is similar to the running stitch but uses longer stitches, ideal for temporarily holding the fabric in place for fitting or applique. Here’s how to do a basting stitch:
- Thread the needle and make long stitches between 1/4” and 1/2”.
- This stitch is useful when you need to keep fabrics together temporarily until they are permanently sewn.
Backstitch
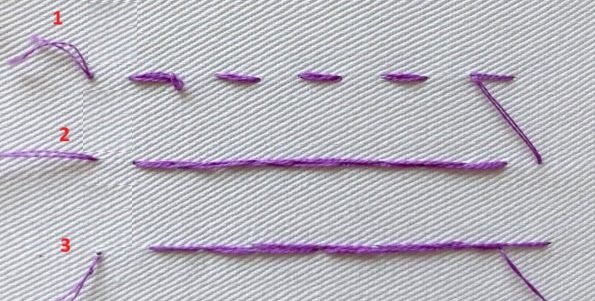
The backstitch is the strongest hand stitch and is often used for seams and areas that will experience wear and tear. Here’s how to do a backstitch:
- Push the needle up through the fabric, then take a small stitch back through the fabric.
- Bring the needle up again one stitch length away, then push it back through.
- Repeat this process, and you’ll end up with a solid, sturdy seam that mimics machine stitching.
Slip Stitch
The slip stitch is perfect for hemming or finishing seams where you want the stitches to be nearly invisible. Here’s a simple way to do a slip stitch:
- Push the needle through the fold of the fabric without letting it show on the front.
- Work in small, discreet stitches to secure the fabric edges, making sure the stitching is hidden on the back.
4: How to Sew a Seam with Needle and Thread
Sewing a seam is one of the most fundamental skills in hand sewing. Whether you’re repairing clothes or crafting a garment from scratch, you’ll need to know how to sew a strong, durable seam.
Steps to Sew a Seam:
- Align the Fabric: Place the two pieces of fabric together with the right sides facing inward.
- Pin the Fabric: Use pins to secure the fabric in place to prevent any shifting while sewing.
- Choose Your Stitch: Use the backstitch or running stitch for a seam, depending on your needs.
- Stitch the Seam: Begin at one end and sew across, making sure to secure the stitches by knotting the thread at the beginning and end of the seam.
5: Repairing a Hole with a Needle and Thread
Hand sewing is also invaluable for repairing holes in clothing. Instead of throwing away, you can easily patch up and sew small holes in your pants and shirts with a few simple stitches.
Steps to Repair a Hole:

- Position the Fabric: Align the edges of the hole so they match.
- Choose the Stitch: Use the backstitch or whipstitch to secure the edges together.
- Stitch the Hole: Start sewing along the edges, making small, even stitches.
- Knot the Thread: Once the hole is closed, secure the thread with a knot to prevent unraveling.
6: How to Sew a Button
Sewing on a button is a quick fix that can save you a lot of money on repairs. Follow these simple steps to attach a button securely.
Steps to Sew on a Button:
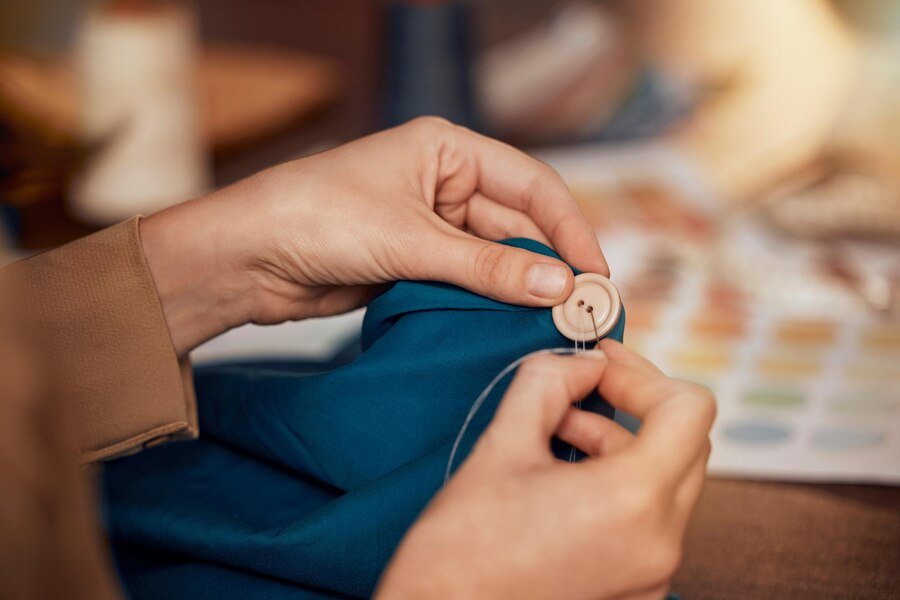
- Align the Button: Place the button in its correct position on the fabric.
- Thread the Needle: Use a strong thread for sewing buttons.
- Sew Through the Holes: Insert the needle through the fabric and buttonholes several times to create a strong bond.
- Finish with a Knot: Tie a knot at the back of the fabric once the button is secure.
Step 7: Decorative Stitches with Needle and Thread
Once you’ve mastered the basic stitches, you can start adding decorative elements to your sewing projects. Decorative stitches, such as the blanket stitch and whipstitch, add flair and functionality to your work.
Blanket Stitch
A blanket stitch is commonly used for applique or as a decorative edging on fabric.
- How to Do a Blanket Stitch:
- Insert the needle through the fabric from the front, then diagonally move it to the back.
- Pull the needle through and repeat the process, creating even loops around the edge.
Whip Stitch
The whip stitch is an excellent option for joining fabric edges together or hemming.
- How to Do a Whip Stitch:
- Insert the needle at the back of the fabric and bring it through to the front.
- Move the needle in a continuous circular motion, making small, even stitches around the edges.
Conclusion
Learning how to sew with needle and thread opens up a world of creative possibilities. Whether you’re fixing a tear in your jeans, creating a custom garment, or trying your hand at embroidery, mastering the basic stitches and techniques will make you a more confident and versatile sewer. By following this step-by-step guide and practicing different stitches, you’ll be well on your way to becoming a skilled hand sewer. Remember, sewing is a skill that improves with time and patience, so keep practicing, and don’t be afraid to experiment with new techniques and projects. You can also do this with machines and set up and thread your sewing machine to perform these daily tasks.
FAQs: How to sew needle and thread: Step-by-step
What type of needle should I use for different fabrics?
For lightweight fabrics like silk or chiffon, a fine needle (size 9-11) is recommended, while medium-weight fabrics such as cotton or linen work well with a universal needle (size 12-14). For heavy fabrics like denim or upholstery, a heavy-duty needle (size 16-18) is ideal.
How do I tie a knot at the end of the thread?
To tie a knot at the end of the thread, double the thread over and twist it around your finger to form a loop. Then, roll the loop between your fingers to create a knot at the end of the thread.
What is the best way to secure the beginning and end of a seam?
At the beginning of a seam, backstitching a few stitches can secure the thread, while at the end of the seam, backstitching again or tying a secure knot can prevent the stitching from unravelling.
How do I create even and straight stitches?
To create even and straight stitches, focus on maintaining consistent tension on the thread and using a thimble to push the needle through the fabric. Additionally, marking the fabric with a tailor’s chalk or using a ruler can help guide your stitches.
What is the purpose of a thimble, and how do I use it?
A thimble protects your finger while pushing the needle through the tough fabric and helps you exert more force for thicker materials. To use it, place the thimble on the middle finger of your dominant hand and push the needle through the fabric using the thimble for leverage.

